最佳实践
# 03、最佳实践 ## 3.1、SpringBoot应用如何编写? - 引入场景依赖 - https://docs.spring.io/spring-boot/docs/2.7.8/reference/html/using.html#using.build-systems.starters  - 查看自动配置了哪些(选做) - 自己分析,引入场景对应的自动配置一般都生效了 - 配置文件中**debug=true**开启自动配置报告。Negative(不生效)\Positive(生效) - 是否需要修改 - 参照文档修改配置项 - https://docs.spring.io/spring-boot/docs/2.7.8/reference/html/application-properties.html#appendix.application-properties  - 自己分析 xxxxProperties绑定了配置文件的哪些 - 自定义加入或者替换组件 - @Bean @Component - ....... --- # 04、开发技巧 ## 4.1、Lombok **安装**: - 第一步:引入插件 ```xml <dependency> <groupId>org.projectlombok</groupId> <artifactId>lombok</artifactId> </dependency> ``` - 第二步:idea搜索安装lombok **使用**: <p style="color:red;text-align:center">简化javaBean开发</p> ```java //@Component //普通类注入到容器中 @ConfigurationProperties(prefix = "mycar") @Data //setter和getter @ToString //重写toString方法 @NoArgsConstructor //无参构造 @AllArgsConstructor //全参构造 @EqualsAndHashCode //重写hashCode方法 public class Car { private String brand; private Integer price; } ``` <p style="color:red;text-align:center">简化日志开发</p> ```java @RestController @Slf4j //日志开发 public class HelloController { @RequestMapping("/hello") public String home(){ /*日志开发*/ log.info("日志开发"); return "Hello,SpringBoot 2"; } } ``` --- ## 4.2 、dev-tools(热更新) 查看官方文档引入依赖:https://docs.spring.io/spring-boot/docs/2.7.8/reference/html/using.html#using.devtools ```xml <dependency> <groupId>org.springframework.boot</groupId> <artifactId>spring-boot-devtools</artifactId> <optional>true</optional> </dependency> ```  --- ## 4.3、Spring Initial(项目初始化向导) ### 0、选择我们需要的开发场景  ### 1、依赖自动引入  ### 2、自动创建项目结构  ### 3、自动编写好主配置类 java,spring • slsher • 0条回复 • 73个浏览 • 2023-04-08 11:45
底层注释
# 2、底层注释 ## 2.1、@Configuration - 基本使用 - Full模式与Lite模式 - 示例 - 最佳实战 - 配置 类组件之间无依赖关系用Lite模式加速容器启动过程,减少判断 - 配置类组件之间有依赖关系,方法会被调用得到之前单实例组件,用Full模式 <p style="font-weight: bolder;text-align: center;color: red">MyConfig.class代码块-@Configuration使用案例</p> ```java /** * 1、 配置类里面使用@Bean标注在方法上给容器注册组件 默认也是单实例 * 2、 配置类本身也是组件 * 3、 proxyBeanMethods :代理Bean方法 * Full(proxyBeanMethods = true)、【保证每个@Bean方法被调用多少次返回的组件都是单实例】 * Lite(proxyBeanMethods = false)、【每个@Bean方法被调用多少次返回的组件都是新创的】 * 组件依赖必须使用Full默认模式 其他默认使用Lite模式。 * */ @Configuration(proxyBeanMethods = true) //告诉SpringBoot这是一个配置类 == 配置文件bean.xml public class MyConfig { @Bean //给容器添加组件---以方法名为组件的id;返回类型就是组件的类型;返回值就是组件在容器中的实例 public User user01(){ User zhangsan = new User("张三", 18,tomcatPet()); return zhangsan; } @Bean("tom") //设置容器的名字 public Pet tomcatPet(){ return new Pet("tomcat"); } } ``` <p style="font-weight: bolder;text-align: center;color: red">MainApplication.class代码块-@Configuration测试案例</p> ```java /** * @SpringBootApplication::这是SpringBoot的一个应用*/ @SpringBootApplication public class MainApplication { public static void main(String[] args) { // 1、返回我们IOC容器 ConfigurableApplicationContext run = SpringApplication.run(MainApplication.class, args); // 2、查看容器里面的组件 String[] names = run.getBeanDefinitionNames(); for (String name: names) { System.out.println(name); } // 3、从容器中获取区间 User user01 = run.getBean("user01", User.class); Pet tomcat01 = run.getBean("tom", Pet.class); Pet tomcat02 = run.getBean("tom", Pet.class); System.out.println("组件"+user01); System.out.println("组件"+(tomcat01==tomcat02)); // 4、com.slsher.boot.config.MyConfig$$EnhancerBySpringCGLIB$$a273aff4@3ff57625 MyConfig bean = run.getBean(MyConfig.class); System.out.println(bean); //如果 @Configuration(proxyBeanMethods = true) 代理对象调用方法 SpringBoot总会检查这个组件是否在容器中有 //保持组件单实例 User user = bean.user01(); User user1 = bean.user01(); System.out.println(user==user1); User user011 = run.getBean("user01", User.class); Pet tom = run.getBean("tom", Pet.class); System.out.println(user011.getPet()==tom); } } ``` --- ## 2.2、@Bean、@Component、@Controller、@Service、@Repository --- ## 2.3、@ComponentScan、@Import ### 2.3.1 @ComponentScan ```java @EnableAutoConfiguration @ComponentScan("com.slsher.boot") =============上下相等================== @SpringBootApplication(scanBasePackages = "com.slsher.boot") ``` ### 2.3.2@Import <p style="font-weight: bolder;text-align: center;color: red">MyConfig.class代码块</p> ```java @Import({User.class, Pet.class}) @Configuration(proxyBeanMethods = true) //告诉SpringBoot这是一个配置类 == 配置文件bean.xml public class MyConfig { ``` <p style="font-weight: bolder;text-align: center;color: red">MainApplication.class代码块</p> ```java //测试@Impoort System.out.println("=========================="); String[] beanNamesForType = run.getBeanNamesForType(User.class); for (String s : beanNamesForType) { System.out.println(s); } ``` --- ## 2.3、@Condition > 条件装配:满足Conditional指定的条件,则进行组件注入 放在配置类上表示,当容器中满足条件时,配置类中的组件才生效; 放在配置方法上的时候,表示的意思是当满足条件的时候配置方法才生效; **注:放在配置类上时,存在先后关系** <p style="font-weight: bolder;text-align: center;color: red">MyConfig.class代码块-测试条件装配</p> ```java @Import({User.class, Pet.class}) @Configuration(proxyBeanMethods = false) //告诉SpringBoot这是一个配置类 == 配置文件bean.xml //@ConditionalOnBean(name = "tom") public class MyConfig { @Bean //给容器添加组件---以方法名为组件的id;返回类型就是组件的类型;返回值就是组件在容器中的实例 public User user01(){ User zhangsan = new User("张三", 18,tomcatPet()); return zhangsan; } @Bean("tom22") //设置容器的名字 @ConditionalOnMissingBean(name = "tom22") public Pet tomcatPet(){ return new Pet("tomcat"); } } ``` <p style="font-weight: bolder;text-align: center;color: red">MainApplication.class代码块-测试案例装配</p> ```java /** * @SpringBootApplication::这是SpringBoot的一个应用*/ @SpringBootApplication public class MainApplication { public static void main(String[] args) { // 1、返回我们IOC容器 ConfigurableApplicationContext run = SpringApplication.run(MainApplication.class, args); // 2、查看容器里面的组件 String[] names = run.getBeanDefinitionNames(); for (String name: names) { System.out.println(name); } // 3、测试条件装配 boolean tom = run.containsBean("tom"); System.out.println("容器中Tom组件:"+tom); boolean user01 = run.containsBean("user01"); System.out.println("容器中user01组件:"+user01); boolean tom22 = run.containsBean("tom22"); System.out.println("容器中tom22组件:"+tom22); } } ``` --- ## 2.4、原生配置文件引入@ImportResource <p style="font-weight: bolder;text-align: center;color: red">MainApplication.class代码块-测试案例装配</p> ```java @ImportResource("classpath:beans.xml") public class MainApplication { public static void main(String[] args) { // 1、返回我们IOC容器 ConfigurableApplicationContext run = SpringApplication.run(MainApplication.class, args); boolean haha = run.containsBean("haha"); System.out.println(haha); } } ``` <p style="font-weight: bolder;text-align: center;color: red">beans.xml代码块</p> ```xml <?xml version="1.0" encoding="UTF-8"?> <beans xmlns="http://www.springframework.org/schema/beans" xmlns:xsi="http://www.w3.org/2001/XMLSchema-instance" xsi:schemaLocation="http://www.springframework.org/schema/beans http://www.springframework.org/schema/beans/spring-beans.xsd"> <bean id="haha" class="com.slsher.boot.bean.User"> <property name="username" value="haha"></property> <property name="age" value="10"></property> </bean> </beans> ``` --- ## 2.5、配置绑定 ### 2.5.1、@Component+@ConfigurationProperties <p style="font-weight: bolder;text-align: center;color: red">Car.class代码块</p> ```java @Component //普通类注入到容器中 @ConfigurationProperties(prefix = "mycar") public class Car { private String brand; private Integer price; ``` <p style="font-weight: bolder;text-align: center;color: red">HelloController.class代码块</p> ```java @RestController public class HelloController { @Autowired Car car; @RequestMapping("/car") public Car car(){ return car; } } ```  ### 2.5.2、@EnableConfigurationProperties+@ConfigurationProperties <p style="font-weight: bolder;text-align: center;color: red">MyConfig.class代码块</p> ```java @EnableConfigurationProperties(Car.class) //1、开启Car配置绑定功能 //2、把这个Car这个组件自动注册到容器中 ```java,spring • slsher • 0条回复 • 72个浏览 • 2023-04-08 11:43
SpringBoot2 入门 - HelloWorld ##
# SpringBoot2 入门 - HelloWorld ## 1、系统要求 - Java8&兼容java14 - Maven3.3+ - idea 2020+ ### 1.1、 maven设置 ```xml <mirrors> <!-- 配置阿里云镜像 --> <mirror> <!--该镜像的唯一标识符。id用来区分不同的mirror元素。 --> <id>nexus-aliyun</id> <!--*指的是访问任何仓库都使用我们的私服--> <mirrorOf>*</mirrorOf> <!--镜像名称--> <name>Nexus aliyun</name> <!--该镜像的URL。构建系统会优先考虑使用该URL,而非使用默认的服务器URL--> <url>http://maven.aliyun.com/nexus/content/groups/public</url> </mirror> </mirrors> <profiles> <profile> <id>jdk-1.8</id> <activation> <activeByDefault>true</activeByDefault> <jdk>1.8</jdk> </activation> <properties> <maven.compiler.source>1.8</maven.compiler.source> <maven.compiler.target>1.8</maven.compiler.target> <maven.compiler.compilerVersion>1.8</maven.compiler.compilerVersion> </properties> </profile> </profiles> ``` --- ## 2、HelloWorld 需求:浏览发送/hello请求,响应 Hello,Spring Boot 2 参考官方开发文档:https://docs.spring.io/spring-boot/docs/2.7.8/reference/html/getting-started.html#getting-started.first-application ### 2.1、创建maven工程 ### 2.2、引入依赖 ```xml <parent> <groupId>org.springframework.boot</groupId> <artifactId>spring-boot-starter-parent</artifactId> <version>2.7.8</version> </parent> <dependencies> <dependency> <groupId>org.springframework.boot</groupId> <artifactId>spring-boot-starter-web</artifactId> </dependency> </dependencies> ``` ### 2.3、创建主程序 ```java /** * @program: boot-01-helloworld * @description:主程序类 * @author: zhuzhiwen * @date: 2023/01/29 13:36 **/ /** * @SpringBootApplication::这是SpringBoot的一个应用*/ @SpringBootApplication public class MainApplication { public static void main(String[] args) { SpringApplication.run(MainApplication.class,args); } } ``` ### 2.4、编写业务 ```java /** * @program: boot-01-helloworld * @description: * @author: zhuzhiwen * @date: 2023/01/29 13:38 **/ /** * @RestController:Controller+RespnseBody * */ @RestController public class HelloController { @RequestMapping("/hello") public String home(){ return "Hello,SpringBoot 2"; } } ``` ### 2.5、测试 ### 2.6、简化配置 官方配置文档:https://docs.spring.io/spring-boot/docs/2.7.8/reference/html/application-properties.html#appendix.application-properties **`application.properties`** ``` server.port=8888 ``` ### 2.7、简化部署 **`pom.xml`** ```xml <build> <plugins> <plugin> <groupId>org.springframework.boot</groupId> <artifactId>spring-boot-maven-plugin</artifactId> </plugin> </plugins> </build> ``` > 将项目打包成jar包,直接在目标服务器执行即可java,spring • slsher • 0条回复 • 77个浏览 • 2023-04-08 11:43
java的学习路线
 ## MyBatisjava • slsher • 1条回复 • 74个浏览 • 2023-04-08 11:01
staking gate.io
# 1、mybatis入门 java web阶段学习了jdbc 连接数据库和操作数据库---->功能更加强大的持久层框架mybatis ssm框架为基础进行项目开发---->由spring整合springMVC和Mybatis springMVC框架负责处理浏览器发送的请求,来调用业务逻辑层处理业务逻辑,根据需求调用持久层实现**持久化操作**---->持久化操作交给Mybatis----->从连接数据库到操作数据库将数据返回给业务层,由springMVC框架将最终的结果响应到浏览器渲染页面。 **iBatis提供的持久层框架包括:** - SQL Maps:封装jdbc的过程 - Data Access Objects(DAO):数据访问对象 --- **项目普遍分为三层:** - 表述层 - 业务层 - dao层 --- ## MyBatis的特性(概念) - **MyBatis是**支持定制化SQL、存储过程以及高级映射的优秀的**持久化框架** - **Mybatis避免了所有几乎的JDBC代码和手动设置参数以及获取结果集** - **Mybatis可以使用简单的xml获注解用于配置和原始映射**,将接口和java的POJO映射成数据库中的记录 - **Mybatis是一个半自动化的ORM(Object Relation Mapping)框架** 相关概念:ORM:即对象关系映射(Object Relation Mapping),就是将java实体类对象和关系型数据库里面的数据来创建映射关系。 - 对象:Java的实体类对象 - 关系:关系型数据库 - 映射:二者之间的对应关系 --- ## MyBatis下载 MyBatis Github地址:https://github.com/mybatis/mybatis-3 --- ## 和其他持久化层技术对比 - JDBC - **SQL加载在java代码中耦合度高,导致硬编码(代码写死,维护不易)内伤** - **维护不易且实际开发需求中SQL有变化,频繁修改的情况多见** - **代码冗长,开发效率低** - Hibernate(全自动ORM)和JPA - 操作简便,**开发效率高** - **程序中的长难复杂SQL需要绕过框架** - 内部自动生成的SQL,**不容易做特殊优化** - **基于全映射的全自动框架(全自动ORM)**,**大量字段的POJO进行部分映射时比较困难** - **反射操作太多,导致数据库性能下降** - MyBatis - **轻量级,性能出色** - **SQL和Javav编码分开,功能边界清晰。Java代码专注业务,SQL语句专注数据** - **开发效率稍逊Hibernate**,但是完全能后接受(自己编写sql语句,维护方便) **MyBatis有两个配置文件** - 核心配置文件 - 映射文件 ---java • slsher • 0条回复 • 65个浏览 • 2023-04-08 10:16
depositar gate.io
**GUI淘汰原因**:界面不够美观,需要jre环境。 **学习GUI的好处**: 1. 为后期学习MVC架构打好基础; 2. 了解监听; 3. 工作时可能需要维护到Swing界面。 **GUI的基本组件**:窗口、弹窗、面板、文本框、列表框、按钮、图片、交互组件、监听事件、鼠标事件、键盘事件。 **GUI的核心**:AWT和Swing。 例子 ```java public class TestPannel { public static void main(String[] args) { Frame frame=new Frame("中秋节快乐");//新建以恶搞窗体 Panel panel = new Panel(null);//面板 frame.setLayout(null);//设置窗体的布局 frame.setBounds(300,300,500,500); frame.setBackground(new Color(0,0,255)); panel.setBounds(50,50,300,300); panel.setBackground(new Color(0,255,0)); frame.add(panel); frame.setVisible(true); //监听事件 监听关闭事件 frame.addWindowListener(new WindowAdapter() { @Override public void windowClosing(WindowEvent e) { System.out.println("关闭事件"); System.exit(0); } }); } } ```java,git • slsher • 0条回复 • 60个浏览 • 2023-04-08 10:16
ChatGPT账号超详细注册教程,赶紧收藏吧!
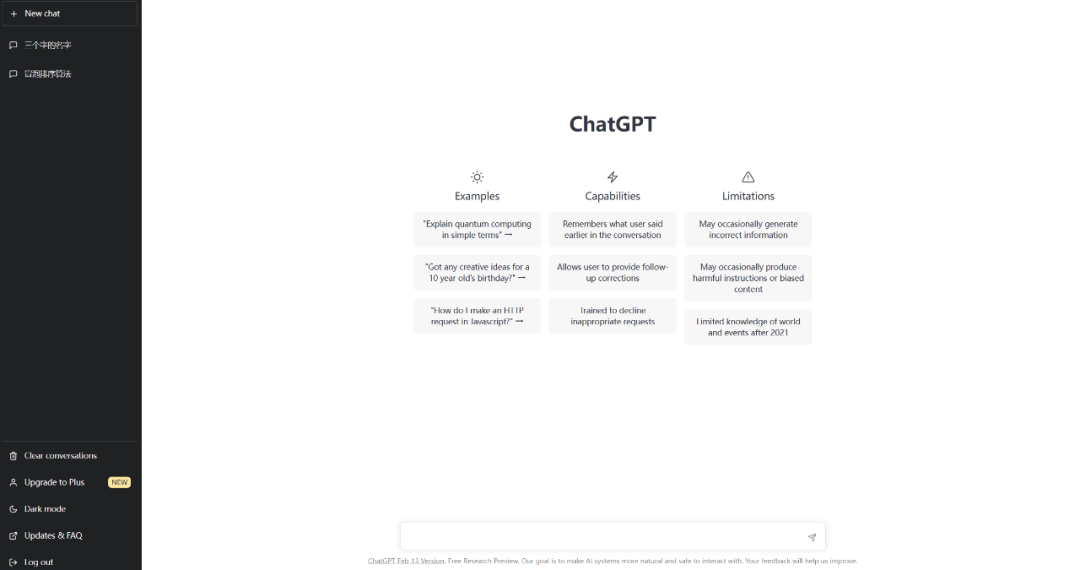
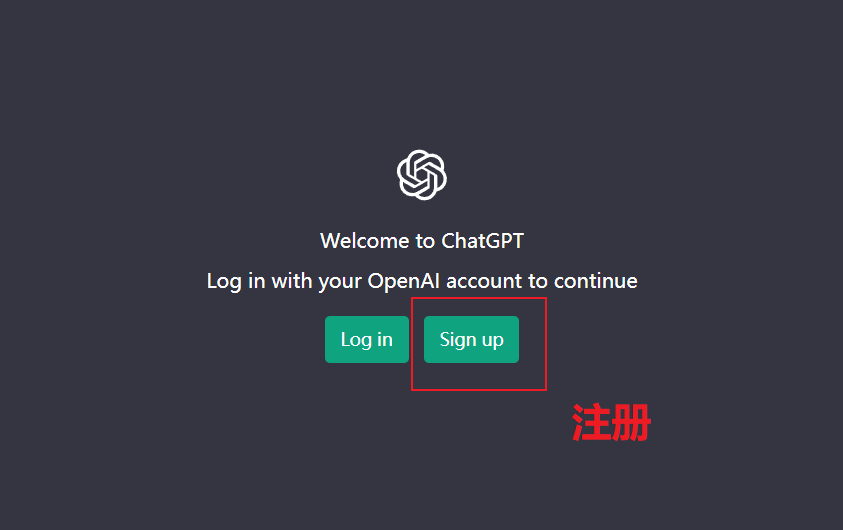
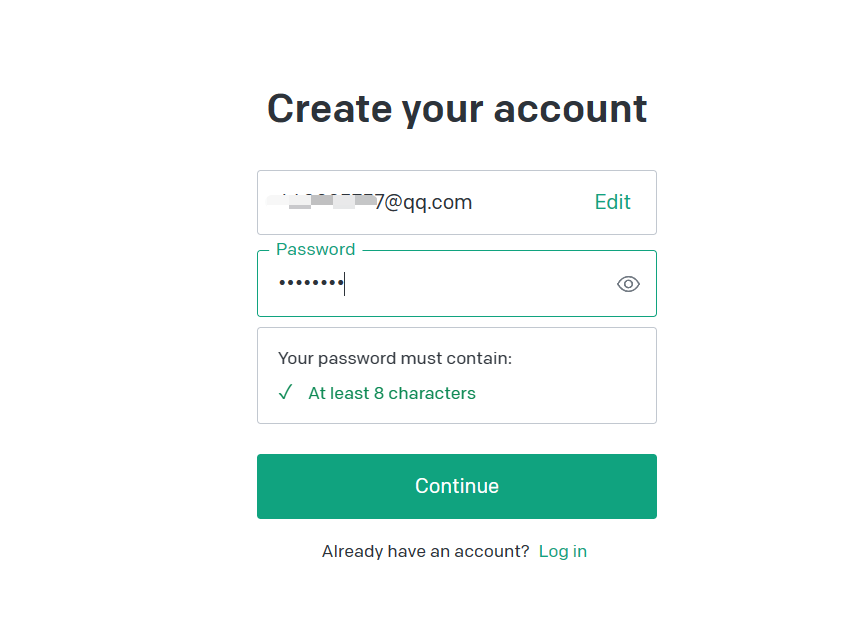
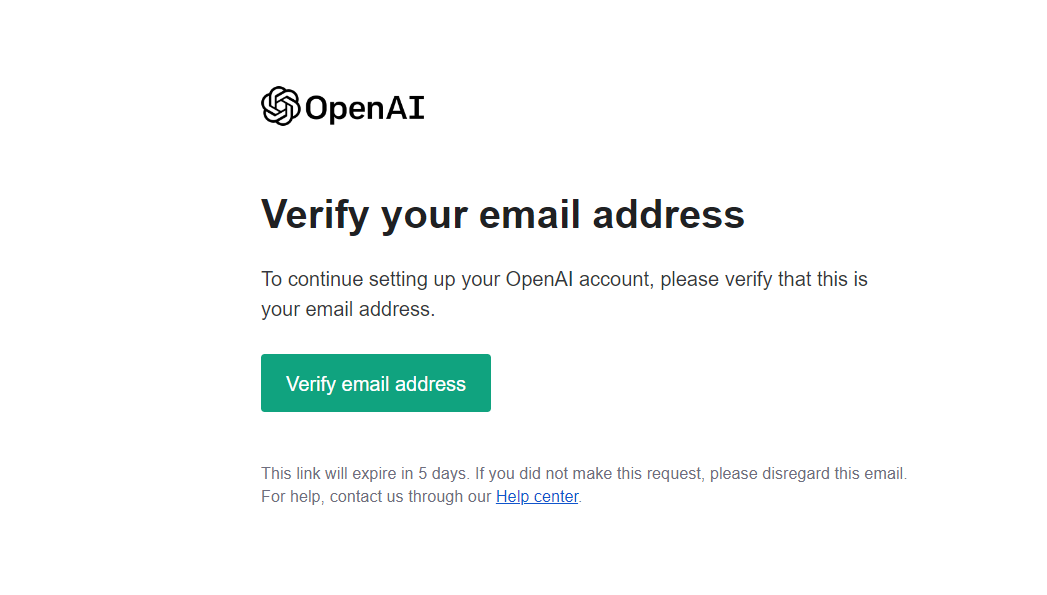
小伙伴们对于ChatGPT 这个新工具还是挺感兴趣的,虽然目前已经有很多的镜像网站,不过确实没有官网的体验好.  注册一个属于自己的ChatGPT账号其实并不难,跟着下面的步骤即可,前提是愿意付费,如若只是想白嫖账号的话,就不必继续往下看了. "ChatGPT 注册教程" 由于相关政策原因,ChatGPT在国内是无法直接访问的,所以注册前需要自备『工具』,至于『工具』的话懂的小伙伴都懂,文章不做过多解释,建议使用付费工具,稳定. 推荐使用谷歌或者是Edge浏览器的无痕模式打开下述ChatGPT地址,点击下图页面中的 "Sign up/注册" 按钮.  进入到邮箱输入界面,输入邮箱即可,目前支持QQ邮箱,不过更推荐使用谷歌邮箱,没有的谷歌邮箱的建议注册一个,还是很方便的.  邮箱校验通过后进入密码配置页面,输入后点击"Continue"即可.  这时你将收到一封验证邮件,点击邮件中的"Verify email address"会跳转至信息填写页面.  信息填写页面如下图所示,随意输入即可,不重要. 接着进入到手机号码验证阶段,由于不支持国内手机号,可用例如漂亮国、某度等国家的手机号码,不支持常见的虚拟号码,例如Google Voice等.github,redis • slsher • 2条回复 • 73个浏览 • 2023-03-27 14:58
xml文件有标红报错 但运行正常 在localhost:的时候 输入用户名密码 后台报错?
xml文件有标红报错 但运行正常 在localhost:的时候 输入用户名密码 后台报错?mysql • slsher • 2条回复 • 76个浏览 • 2023-02-19 22:37
